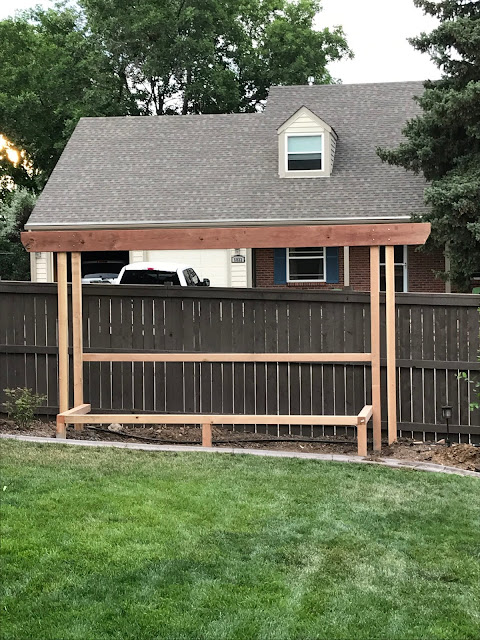
The next step was to build the frame work for the pergola as well as the bracing for the water feature. Since the ground does slope on this side of the house, I built everything level and accounted for the slope when I add the other pieces. The vertical posts that hold everything together are buried three feet in the ground and set in concrete so that nothing will move from all the weight of the water. For a reference of size, the top board is 16 feet long.
Since I would be putting a plastic liner in the pond area, I went ahead and completed the painting first so that I would not have a chance of puncturing the liner working around it.
For the back of the water feature I used cement board and then covered the board with 18" travertine stone tiles. Inside the stone there is three 24" stainless steel spillovers. I found these on eBay for about $40 each. It was a little tricky, but I cut the spillovers into the pieces of stone so that it looks like the water is coming right out of the stone. The black liner is made for industrial ponds so it has a lifespan of about 20 years. Below is a picture once the liner was installed.
Once the liner was installed, I decided to try it out. Below is a short video. All the plumbing for the fountain is what is used for pools. I have a 3,200 gallon per hour pump attached to the spillovers and all the pipes are run in 3" PVC so that there is plenty of water running through the system. I even hooked up the pump to a controller so I can turn it on inside my house or from my iPhone like all the rest of the lights in my house. The pump is actually about 20 feet to the left at the corner of my yard so you cannot hear it when it is running.
Since this water feature is right next to the patio with the fireplace, I mimicked the arbor and stone columns. The way I built the columns was a little different because everything was going to get wet from the fountain. This meant that all trim would need to be made out of PVC or cement. The white top cap on top of the pond liner is actually cement siding that will hold up very well to the elements that was then painted with an epoxy paint so that if snow sits on the surface the paint will not come off. I also used cement siding for the front of the fountain since it comes in contact with dirt and could get hit by the sprinkler. In the below picture you can see that I have started adding the stone so that it will also match the fireplace.
As I was getting closer to completion, I decided that I really was not liking the front of the pond. It was just looking too plain. I changed this by adding some PVC strips to add some texture. It really made a huge difference for literally $12 of PVC trim. You will see in the below picture that the dirt is not yet built-up to the bottom of the water feature. I planned to bring in about 5" of dirt to help make the slope of the ground not look so much on the right hand side.
Part of the project also included adding underwater lights. These were purchased off Amazon and I tied them into the low voltage landscape lighting I already had in the backyard.
The last part of the project was finishing the trim and adding the last of the dirt. Next summer I will add plants and mulch, but since this was not completed until just a few weeks ago it did not make sense to do it this year. I will end this blog post with a few more pictures of the finished product. It took about four weekends but it really turned out the way I wanted it and added a ton of privacy to my yard


No comments:
Post a Comment