It has been quite a while since the last update and I am now
in the midst of a huge backyard renovation.
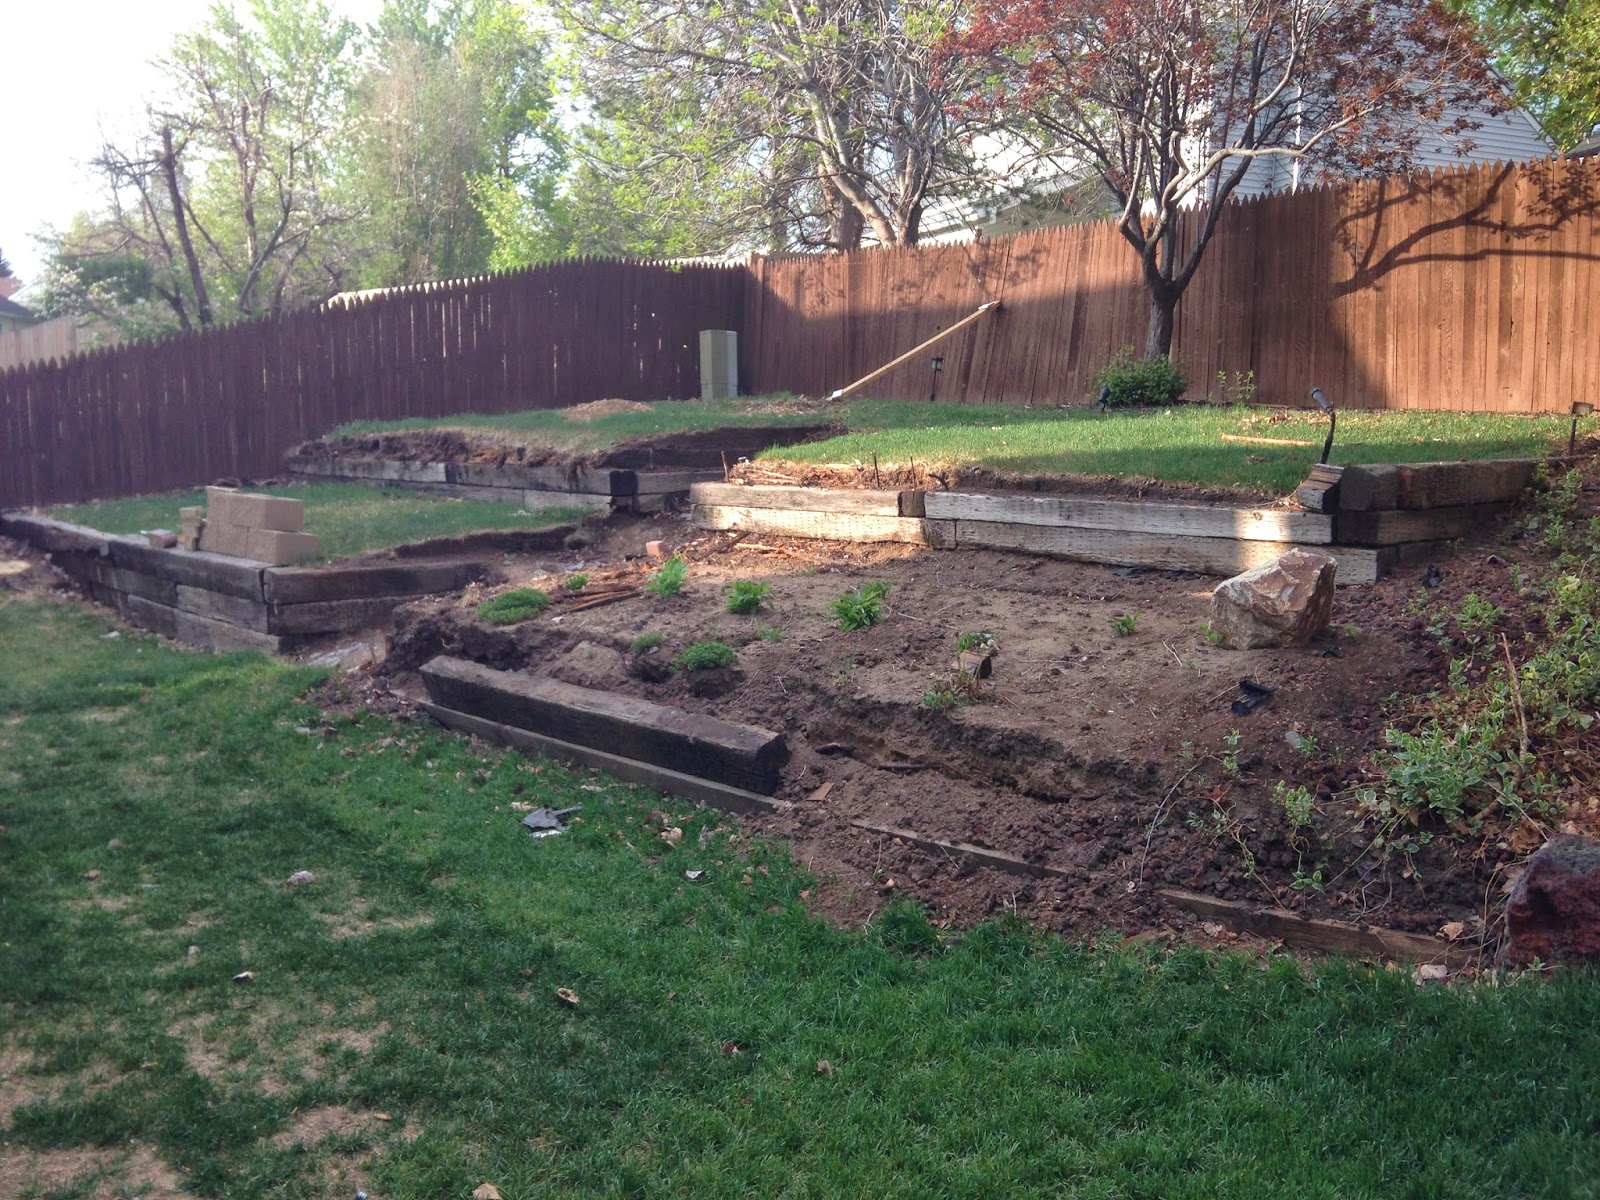
Below you can see the retaining wall that used to be in my
backyard. I decided that it was time for
it to go because of the age and it falling down. I also wanted a bigger backyard for
grass. The three large trees in this photo were also removed.
I started to take out the wall myself but after a few hours
I realized that I would need a little help since some of the timbers were well
over 100 pounds and rebar reinforced. I also had a lot of dirt that would need
moved.
I found a contractor that had a bobcat tractor and for $300
he came and removed the wall and re-graded the backyard. I took a time lapse video from my upstairs
window so you can see how it was done.
This is what my yard looked like once the tractor left.
After the old retaining wall was removed I decided to build
a cement block retaining wall at the top of my yard so the slope of the yard
would be less. Here is a picture of about half of all the old timbers. I put them for free on craigslist so most of them are now being used in someone else's yard.
I started out by doing some additional grading to cut back
the soil since the tractor was not able to do this. Below was the result when I was done. The
string is for the top of the wall so that I could measure across the full
length of the yard.
For retaining walls, drainage is key because any water
behind the wall could make it fall or will freeze in the winter and cause it to
come out of alignment. I started by
digging 9-12 inches below the surface of the ground and 28 inches wide.
I then placed a perforated pipe in the trench. The pipe is covered in a sleeve in the below
picture that will keep the dirt from clogging the holes.
I then filled the trench almost all the way up with ¾”
granite rock. This allows the water to
flow down to the pipe and then flow away from the wall. The stone was then tamped down with a hand tamper to make the rock lock into each other.
After the gravel was placed in the trench, it was time to
add the cement blocks. These blocks were
purchased from General Shale here in Denver and are a higher grade of block
than you would find at the home improvement stores and is specifically designed
for retaining walls. One block is 18”
long, 8” high, and 12” deep. The blocks
also weigh 78 pounds each which made the total weight of the cement blocks a
little over 6,000 pounds. It took three
trips in my truck to get them all.
I placed the first level with my brother’s help and we had
to make sure everything was perfectly level otherwise all other levels would be
off. We tamped down the stone as we went
to make sure everything would be solid.
As we placed the cement block we added more gravel inside the cores and
filled up the gap behind the wall. Below
is after the first of three levels.
This picture is after the last level. We went through nine truckloads of 3/4”
granite for a total of a little over 16,000 pounds of stone. We had to haul it all in paint buckets to the
wall location so my brother and I moved a lot of stone!
Before we put the top caps on, we laid a layer of landscape
fabric over the stone so the dirt will not clog up the stone but still allow
the water through.
After the caps were installed on the wall, I backfilled with dirt and
added a couple of pots I had around the house.
It took my brother and I two full days to build the wall but it turned
out really well. The next two pictures
will show the final result. The total length of the wall is just under 45 feet.
I still have some grading of the dirt in front of the wall
and then I will add a new sprinkler system and install new grass. Lastly I will be building a stone column at each end of the wall that will look similar the the columns I built in earlier posts except they will have built-in landscaping lights. I will post a picture once that is
completed.
Project cost breakdown:
Excavating: $300.00
Cement Block $450.00
Stone: $180.00
Total: $980.00
Cement Block $450.00
Stone: $180.00
Total: $980.00
The next project will be installing a paver patio to the back of my house and I hope to have that started this weekend. Well that is all for now.


No comments:
Post a Comment