Around the same time I also had concrete edging installed around my house so you will see this in the pictures as well. By adding the edging, it really helps in keeping the mulch out of my yard.
Once the fence was installed I waited a couple of weeks for all the wood to dry out. I then went and stained the fence so it would match my house better as well as help keep the fence from aging as quickly. I used an electric paint sprayer and to do the entire fence it took almost 14 gallons of stain. Below are pictures of the finished product.
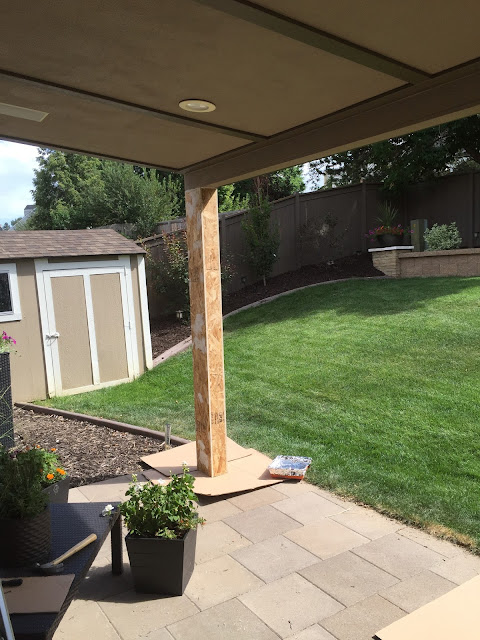
The next project was creating new columns for my patio. When I rebuilt the patio awning (seen in a previous blog) I used 4x4 posts and I never really liked the way it looked. This is what the column looked like before:
This summer I decided to make the columns a little larger. I did this by using exterior wood sheeting cut to make a box around each of the three columns. To make the project easier on me, I had Home Depot cut the wood for me while I was at the store since they have the large saw that can cut 4'x8' sheets of wood. I then assembled the columns around the existing post and glued and nailed the pieces together.
Once that was complete, I filled all the nail holes and did a rough sanding. To coat the columns I decided to use the Deck Over 10x product again that I had used for the ceiling. This material is made to coat old decks but has many other uses. The product is very thick and appears to almost have sand in it. When you use the special roller that comes with the product, the product almost looks like stucco. That is why I use it for flat surfaces as well since it is much easier than using actual stucco. Once I coated the columns in the product, I then painted it with two coats of exterior paint and added PVC molding to the bottom of the columns so it cannot rot. Below is the finished project. It only took about four hours from start to finish but it made a huge difference to my patio!
The next project was to extend my patio and create an outdoor kitchen. I did this because I really wanted a nice grilling area as well as create some privacy from my neighbors patio. Previously the area had a couple plants but really just looked unfinished. The first step was for me to build the two main structure posts to help with the addition of the privacy wall and awning extension. These posts were 12 feet long and were buried over three feet in the ground and then cemented in place. Below is a picture of the posts installed. Note how you can see my neighbors patio since their house sits higher than mine.
The next step was to install the outdoor kitchen. I started by making a wood frame for the area. Any wood that touches the ground was pressure treated so that it will not rot with the snow and rain. Also I lined any area that surrounds the grill with cement board just in the rare case that the area gets very hot and could catch fire.
The next step was to cover the frame with additional cement board. Since this is open to the elements, I will not have to worry about any of the structure rotting. After the cement board was installed I then added additional molding to make the kitchen area look like it had raised paneling.
I also added some PVC trim to the base of the kitchen area. Once all the trim was complete, I then painted everything with three coats of paint as well as added a tile top to the grilling area. One of the last steps I completed was the addition of the awning. I left this part open so that smoke can exit from the grill. Lastly, I decided that I wanted to add some pendant lights. I found some metal cube lights on eBay for $11 each. I wanted to have the lighting in this area attached to my landscape lights so that the lights would come on every night. I found some LED Edison bulbs that are for RVs that run on 12 volt current but still use a standard bulb base. I then added a dimmer to them. Below is the finished project. It took about 4 weekends but it really turned out well.


